January 27, 2014

My Running Journey Part 3 {Finding Your Second Wind}

Can you believe it's the last week of January?  That means I'm wrapping up my Running Journey Series.  Each Monday of the month I've been sharing a bit of what I've come to love and learn about running.  Not that I'm an expert by any means, but I always enjoy hearing others ideas, and finding a bit of motivation to get going.

My Running Journey Part 3 {Finding Your Second Wind} from Blissful Roots

Finding my second wind has been one of the biggest "ahas" I've had as a runner.  

I LOVE Shelley from House of Smiths (who doesn't?)!  I remember reading one of her weight loss journey posts quite awhile ago, but a quote I read in her post has stuck with me ever since then.  It said:

"Most people never run far enough on their first wind to find out they've got a second wind."
-William James

By the time I read this quote, I'd actually already found it to be true, but hadn't really ever thought about it in the way to quote states it.  Here are a few tips that I've found helpful in finding my second wind.

SET A CHALLENGING GOAL
This was my week two post of My Running Journey Series.  I have to say that setting my challenging goal (doing Ragnar) pushed me enough to find my second wind.  If I'd never given myself that challenge, I would have just been content to run like I'd always run, and not pushing myself any further.  I was running on my first wind, getting tired, then stopping.  Unless you have something challenging you to go further, you probably won't.  Set a goal to get you past that first wind.

SLOWLY INCREASE YOUR RUNNING TIME
It's just about impossible to make yourself take one more step when you're dead tired and exhausted.  Just start with something small.  Even just one or two minutes more past your exhausted stage can make a difference.  After time, you'll get used to the extra two minutes, and then you can increase another minute or two, then another, and another.  For me, the first three miles of my run are always the hardest.  I used to never go past three miles because it was hard, and I thought I'd feel that way for my entire run.  As I've slowly increased my time, I've come to find that it actually gets easier for me the longer I go.  My body seems to settle in, and I honestly do feel that second wind kick in.  It's really cool, actually!

SAVE YOUR FAVORITE SONG FOR THE LAST
I've been amazed with how my body responds to music when I run.  I have a lot of great songs on my playlist, and they help me throughout my run, but I have a few songs that I always save for the last stretch just before my second wind, because they bring a burst of energy when I don't have much to pull from myself.  Right now my song is Katy Perry's Roar.  I tell you every time that songs comes on, I feel completely energized!  I usually have to switch up my last stretch songs because I do get a bit bored with them after awhile.  Keep your ears open whenever you're listening to music for your next last stretch song, or you can search running playlists online and find songs that way.

PRAY
(This actually doesn't relate exactly to finding my second wind, but it's helped me keep going even when I've wanted to quite, so I'm putting it in here.)

I pray for just about about everything in my life.  Well, okay, I don't pray about what bread to buy at the grocery store, or what to wear for the day, but the big, important things I do.  The reason I do is because I realize I'm human and I can't do a lot of what I want to do on my own.  I believe I need some divine help in my life to accomplish my goals and purpose.  I'm not saying I pray to go more miles and it happens right then and there, but I do have a habit of praying for a desire to get up and stick with my goals.  It's made a big difference for me.  I LOVE this quote from Spencer W. Kimball:

"Men and women who turn their lives over to God will discover that He can make a lot more out of their lives than they can.  He will deepen their joys, expand their vision, quicken their minds, strengthen their muscles, lift their spirits, multiply their blessings, increase their opportunity, comfort their souls, raise up friends, and pour out peace."

Did you see that line about strengthening our muscles?  I honestly believe it!  There are many days I get up, I run, and at the end of it all I wonder how I did it.  For me, this quote explains why. 

Hopefully you've found a thing of two that's either kept you motivated, or got you motivated to stick with your running/exercising goals.  I know they've helped me along the way, and I couldn't be more grateful.  Running has been such a blessing for me.  That may sound funny, but it's true.  My days are much more productive and pleasant when I start them with a run.  I have more energy, I'm more patient, I feel good about myself, my pants fit, and my overall health and well-being are simply better.  I read another quote on Shelley's blog that I loved.  This one comes straight from her:

"It's never gotten easier, but eventually the results started outweighing the pain and struggle.. and that's why I keep going."
-Shelley Smith

I couldn't have said it better myself.  There will come a point where the results outweigh the struggle, and that's why you get up and do it!

Here are weeks one, two, and three's posts if you missed them.

My Running Journey Part 3 {Finding Your Second Wind} from Blissful Roots
Week 1

My Running Journey Part 3 {Finding Your Second Wind} from Blissful Roots
Week 2

My Running Journey Part 3 {Finding Your Second Wind} from Blissful Roots
Week 3
Thanks so much for stopping by!  I hope you found a little something worth your time.

Linking up to these parties & Savvy Southern Style.


 photo Signature4_zps147dea12.jpg
Pin It

January 24, 2014

DIY Valentines Straws

I know, I know it's not February yet, and I hate to do this, (I have a thing with allowing a month to finish itself out before jumping into the next one) but I have to sneak one valentine post in before January's over.  And yes, I'm quite aware that I'm way behind on the valentine train in blogging land, and I probably need to change my tune if I want to survive as a blogger.  

DIY Valentines Straws from Blissful Roots

My boys love straws, but we hardly ever use them at our house.  That is until a holiday comes along and I can't stop hot gluing embellishments to them.  Then we use them more frequently because I think they're so cute.  And truth be told, I love when my boys use these kind of straws, but if they just sit in a cute container as decor, then that's fine with me too.

DIY Valentines Straws from Blissful Roots

I found the glitter heart stickers at Dollar Tree, and the red heart felt stickers at Michaels.  Both came in packages for just $1.

  I've had the straws for awhile.  I'm not quite sure where I got them, but I'm sure they're everywhere this time of year.  BTW, have you ever tried to buy plain white straws?  I was looking for some to do wintry snowflake straws ( I can't stop!), but I could not find a single white straw anywhere!  Let me know if you've ever seen them.

DIY Valentines Straws from Blissful Roots

I added a dab of hot glue to the straws, attach the heats, and viola!  Instant fun!  Well, instant fun for me because I get to use a lot of pink and hearts.  I have a house full of boys, so those two things rarely get used in my neck of the woods.

DIY Valentines Straws from Blissful Roots

The perfect easy, inexpensive, and adorable addition to any valentine table or party. 

And to show off more of my straw embellishing addiction, you can check out my Halloween straws.  They're my FAVORITES!

Thanks so much for stopping by!  I hope you found a little something worth your time.

Linking up to these parties & Savvy Southern Style.


 photo Signature4_zps147dea12.jpg
Pin It

January 23, 2014

Shaving Cream & Food Coloring Art For Kids

Do you ever read Family Fun magazine?  I used to have a subscription, and loved seeing all the clever activities and crafts for kids.  This art project came from one of their issues many years ago.  My boys love this project so much that we've done it for years now. 


Shaving Cream & Food Coloring Art For Kids from Blissful Roots

My four-year-old said he had never done this activity before (he has, but it's been a long time), so we got out the shaving cream and food coloring a few days ago.  This art project is always a hit with kids of any age, but it is a bit messy.  In fact, I think the Family Fun magazine had this as an outdoor project for summertime.  We've always done it inside, and it works.  You just have to be careful with all the food coloring.  Have you and your kids wear aprons and gloves if you're worried about getting messy.  We never do, but we should.  Our hands are always stained for a day or two after the project.  All part of the fun, though.

SUPPLIES
Shaving Cream (not gel, CREAM)
Cookie Tray (I use cheap ones from the dollar store)
Food Coloring(the we love using the neon colors)
Popsicle Sticks (for swirling the colors around)
Knife (for spreading the shaving cream)
Card Stock (For imprinting designs)
Paper Towels (for keeping the mess somewhat under control)

HOW TO
*Start by squirting some shaving cream on the cookie tray, and then spread it around just like you were frosting a cake.  It doesn't need to be deep, just a nice covering of the entire tray.

Shaving Cream & Food Coloring Art For Kids from Blissful Roots

*Next, squirt drops of food coloring in the shaving cream.  You can do one color at a time, or multiple.  If you do multiple colors, drop them in different parts of the shaving cream.

(We were working on a valentine project in these pictures.  We usually don't just use one color.  The more, the merrier!)

Shaving Cream & Food Coloring Art For Kids from Blissful Roots

*Swirl the food coloring with the popsicle stick.  If you're doing multiple colors, make sure to remind your kids to not over-swirl.  When they do, it just ends up looking brown because all the colors mix too much.  You want the colors to look swirled together with individual colors showing, not just a brown blob.

Shaving Cream & Food Coloring Art For Kids from Blissful Roots

*Take the card stock and gently push it on to the colorful shaving cream.  You can do a big piece of card stock to get the entire cookie tray at once, or you can cut the card stock into smaller pieces and just do sections of the tray.  Play around with it and see what you like.  We like to do a lot of smaller sizes most often, but we do whole pages sometimes as well.

Shaving Cream & Food Coloring Art For Kids from Blissful Roots

*Pull the card stock off of the shaving cream, and then lay the paper on a flat surface and and use a popsicle stick to scrape off any excess shaving cream.  You can kind of see the shaving cream on the card stock here.  That's what you will scrape off.

Shaving Cream & Food Coloring Art For Kids from Blissful Roots

*Set the card stock aside and allow to dry a bit.  Don't worry if the card stock begins to curl while it dries.  Ours always do.  I just lay them under a heavy book when they're completely dry to flatten them out.

Shaving Cream & Food Coloring Art For Kids from Blissful Roots

And that's it!  This is honestly one of the coolest art projects I've ever seen!  I never get tired of pulling the card stock off the shaving cream, and scraping it off to see the end product.  Beautiful every time!  

Here are a few of my four-year-old's masterpieces from the other day.

Shaving Cream & Food Coloring Art For Kids from Blissful Roots

Shaving Cream & Food Coloring Art For Kids from Blissful Roots

Shaving Cream & Food Coloring Art For Kids from Blissful Roots

Shaving Cream & Food Coloring Art For Kids from Blissful Roots

Shaving Cream & Food Coloring Art For Kids from Blissful Roots

Shaving Cream & Food Coloring Art For Kids from Blissful Roots

Stunning, right?  He was so proud of all of them!

Shaving Cream & Food Coloring Art For Kids from Blissful Roots

This is the perfect activity for these cold wintry days when we're inside more often than not.
Oh, and we always have to use our fingers to play with the shaving cream when we're done with all of our pictures.  Way too much fun!
Happy swirling!

Thanks so much for stopping by!  I hope you found a little something worth your time.

Linking up to these parties & Savvy Southern Style.
 photo Signature4_zps147dea12.jpg
Pin It

January 22, 2014

Yogurt, Fruit, & Granola {Two Recipes, Two Ways}

Here we are at week three of my Healthy Breakfast Recipes.  If you didn't even know it was week three, and you're wondering what weeks one and two were, don't worry  I'll have links at the end of this post.  I promise you'll want to check them out.  They're both amazing!  As are today's healthy breakfast recipes.

Yogurt, Fruit, & Granola {Two Recipes, Two Ways} from Blissful Roots

The recipes for today are reposts, but with a few new additions.  
We really like yogurt at our house for breakfast.  My boys eat it every morning, and never tire of it.  My husband takes it to work for a snack every day.  I love it any time of the day.  Here are two of our favorite ways to enjoy yogurt, fruit, and granola.

Yogurt, Fruit, & Granola {Two Recipes, Two Ways} from Blissful Roots

The first combination we love is this easy granola topping with fresh (frozen works too) berries (strawberries, raspberries, blueberries, and blackberries are our favorites), and light vanilla yogurt.  One of the big downfalls of yogurt is the sugar content.  Maybe you already know this, but have you ever checked out how many grams of sugar in one regular 6-ounce container?  Most of them have around 30 grams.  That's a ton of sugar!  I've heard before that a good rule of thumb is to not eat anything with more than 10 grams of sugar per serving.  Thirty totally blows the ten out of the water.  So, I try to find ways to get my boys to eat light yogurt (I'm still working on my husband).  They will actually eat the Kroger Light Vanilla (I buy mine at Smith's) without anything on it, but I like adding the berries and granola on top for extra nutrition.  All of my boys devour this every single time!

This granola topping only has 5 ingredients (oatmeal, almonds, and wheat germ just to name a few) and is totally healthy and simple to make.  Click here for the recipe.

Yogurt, Fruit, & Granola {Two Recipes, Two Ways} from Blissful Roots

Yogurt, Fruit, & Granola {Two Recipes, Two Ways} from Blissful Roots

The second recipe is a quinoa-pumpkin seed granola with Greek yogurt and dried cherries.  I posted this recipe last year after my sister had us try it for the first time.  A year later, we're still eating it, and loving it!  I love that my young boys will eat this.  They devour the Greek yogurt (which I wasn't sure if they'd like or not) and the granola, and the cherries.  I was totally surprised they liked this granola.  There's all things healthy in it (quinoa, pumpkin seeds, flax seeds, almonds), but it does have amazing flavor, and when you pair it with the cherries and Greek yogurt, the combination is so yummy, so satisfying, and so healthy!
 BTW, we use vanilla or plain Greek yogurt.  If you've never been able to eat Greek yogurt, try this.  I can't do Greek yogurt alone, but it's delicious with these toppings!  Click here for the granola recipe and to see the brand of Greek yogurt we like.

Yogurt, Fruit, & Granola {Two Recipes, Two Ways} from Blissful Roots

Yogurt, Fruit, & Granola {Two Recipes, Two Ways} from Blissful Roots

So, there you have our favorite healthy ways to eat yogurt with toppings in the morning.  Both are great ways to start your morning.  How do you like your yogurt, granola, fruit, or all of the above?  I'd love to add to our collection.  We love these, but more options would mean more variety.

And here are the links to weeks one and two recipes.


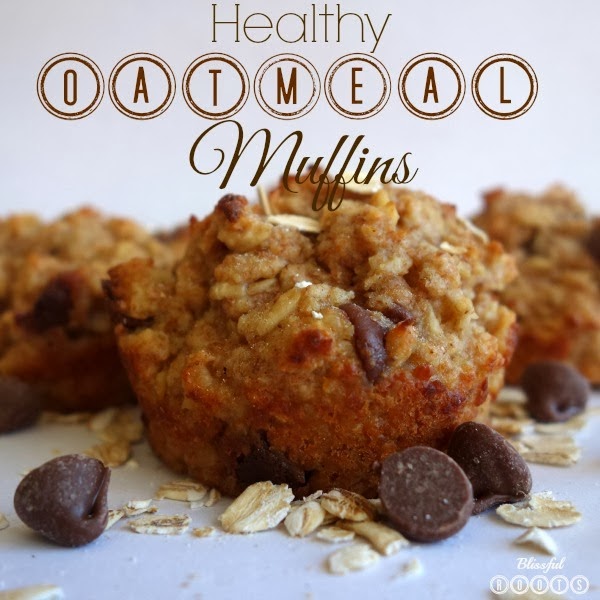
Healthy Oatmeal Muffins from Blissful Roots
Week 1:  Healthy Oatmeal Muffins

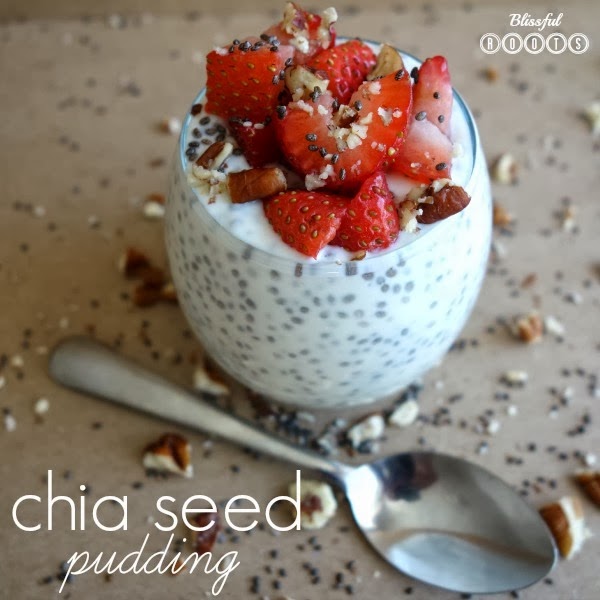
Chia Seed Pudding from Blissful Roots
Week 2:  Chia Seed Pudding

Thanks so much for stopping by!  I hope you found a little something worth your time.

Linking up to these parties & Savvy Southern Style.

 photo Signature4_zps147dea12.jpg
Pin It

January 21, 2014

Our Good Fortune That Life Is Difficult {Printable}

I have another quote today from my mom's grand library of quote books.  I've been reading through one entitled 'The Power of Adversity'.  I wish I could make a printable from every page of this book, but I'll settle on picking my top two or three and sharing them over the next few months.

Our Good Fortune That Life Is Difficult {Printable} from Blissful Roots


The section these quotes come from is entitled, 'Difficulties Build Courage'.  Sterling W. Sill is the author of these pages.  On the surface, we probably all think this quote is completely backwards, but deep down I'm sure we all realize it's true.  As hard as the difficult times are, I have to say I agree with this quote.
Our Good Fortune That Life Is Difficult {Printable} from Blissful Roots
Click to Print
He then goes on to quote Charles Kingsley.  I loved this quote just as much, if not more than the first, so I had to make them both into printables.

My twins' greatest wish these days is to never get married, live together, play video games all day, have snacks, and never get out of their pajamas.  It's kind of impossible to convince two seven-year-olds and a four-year-old (they've recruited their younger brother to join them) that the life they're wishing for won't bring them happiness.  They can't possibly fathom that hard work and challenges will bring them true happiness.  And actually, there are several days I have to remind myself of that.  But I love how Mr. Kingsley put it.  There are so many things we would  miss out on in life if we were only idle.

I'm sure there's not a mom (or anyone) alive that wouldn't love a day of nothing, but really a day is all I could take.  I've learned to enjoy the work and demands I have. They truly do breed characteristics that I would not be able to gain otherwise.

Thanks so much for stopping by!  I hope you found a little something worth your time.

UPDATE
Unfortunatley, allowing you to print this printable by Rhonna's App is in violation of the EULA.  You can use my image as a guide to create your own.  Sorry!

Linking up to these parties & Savvy Southern Style.

 photo Signature4_zps147dea12.jpg
Pin It